Thursday, December 20, 2012

Today I continued to work on my 3d ball. I finished the ground shadow, the key shadow, the specular highlight, and the sphere. I still need to work on giving the ball more volume, and make the shadow less sharp

Tuesday, December 18, 2012

Today I continued to work on my sphere project. I added the ground shadow, but I need to make it a lot darker. I also added the ambient shadow. I added it by using the brush on soft. I also worked on giving the sphere volume but I still need to add the specular highlight.

Blending Within a Mask

This is a picture that I painted. I did this by using a mask, and a the flow and opacity tools. The sphere looks like it somewhat has volume.

Friday, December 14, 2012

Today I worked on making a sphere by blending colors together. I turned the flow down to 1% and painted in a circular motion to give the sphere volume. I still have to do the shadow.

Wednesday, December 12, 2012

Today i worked on blending and painting with a mask. I used the brush with the flow turned down to 1% and I created a mask on the circle.


Monday, December 10, 2012

Today I finished my blending projects and my haunted house projects. The pictures of them are below.

Final Haunted House Project

This is my final haunted house project. I completed this by cutting out a house, replacing the background and sky, and beating up the house.

Blending Final Project


Above are my two 5 by 7 blending assignments. I used the flow tool to do this.

Thursday, December 6, 2012

Today I worked on painting in Photoshop. I am currently working on blending three colors together. I found that adjusting the flow allows for the best blending. I am just using a regular brush.

I used a lot of different brushes for this one to add texture. I also used the leaf brush for a pattern.

I painted this using different kinds of brushes.
This is my rainbow picture. I used the flow and opacity tools to have a gradient effect. The flow tool worked best.

Tuesday, December 4, 2012

Today I continued working on my haunted house project. I added bats and blended the house into the background more. I also made the house look more broken down and beat up. I used the healing brush to make it look like the columns are broken.

Friday, November 30, 2012


Today I worked on my room and my haunted house. I added a window and door to the room. And I added a van and beat up the house more for my haunted house project.

Wednesday, November 28, 2012

Today I worked on my haunted house project and my one point perspective room.

Monday, November 26, 2012

One Point Perspective Project


Hello again fellow bloggers, 

The above is my one point perspective photo. The assignment was to draw lines. As you can see the horizon is in green, the vanishing point is in yellow (with its accompanying diagonal lines), and the blue are vertical lines displaying how straight the photo is. It was a pretty easy assignment as all I did was draw lines, change their color, and potentially the hardest part label them.

-Julia

Monday, November 19, 2012

Hello,
Today I worked on my haunted house project. I added plaster and cracks on the walls and a tree. I am almost finished with it. I just need to make it more beat up and change the lighting.

Thursday, November 15, 2012

Hello, todayIcontinued working on my haunted house project. I changed the background and added a tree. I also added some bushes in the front and some boards on the window and door.

Tuesday, November 13, 2012

Hello, today I continued to work on my animation cycle project. I finished my flame one and made two others.


Lady+Stool=Magic

This is my other animation cycle. I chose to do this because I thought that it looked cool. I cropped each picture out and then lined them up and used the animation tool in photoshop like I did with the dog. The picture quality is not very good. But it still is amusing.


Dog Walking (Animation Final)

Hello,
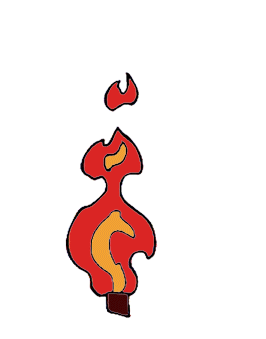
This is my final animation project. I originally was using a flame, but I couldn't get that one to be continuous. I did this by using the animation tool in photo shop. I used several different pictures and lined them with each other. Then I adjusted the time of each frame to be .1 so that it would look more animated and continuous.

Friday, November 9, 2012

  Today I worked on my cycle animation project. I used a flame.

Wednesday, November 7, 2012

Today I worked on my animation cycle. Im using a flame. I still need to add color and make it a continuous loop.

Monday, November 5, 2012

Today I added a darker sky and I added some bushes. I still have alot to do.

Thursday, October 25, 2012

Today I added a background to the house. I also partially cut out some trees and bushes. I still have a lot more work to do.

Tuesday, October 23, 2012

Today, I boarded up a window on my house and added some broken windows.

Wednesday, October 17, 2012

Today I worked on cutting out my house from the background. I used polygonal selection tool.

Monday, October 15, 2012

Final Spiderdoo Project

Hello,
Today I finished my spider-doo project. I changed the color of scooby's face to match the color of spider man's body. I then added webbing to scooby's face. I also cut out the words "spider doo".

Thursday, October 11, 2012

Hello,
Today I continued working on my spider-doo project. I did the letters and adjusted the lighting.

Tuesday, October 9, 2012

Hello,
Today I worked on spider-doo's mask. I finish the webbing. I still need to make the mask lighter and adjuct the lighting. I also started cutting out the letters. 

Friday, October 5, 2012

Today I continued to work on my spider-doo project. I can't get the mask for the face. I still have to do the letters.

Wednesday, October 3, 2012

Today I continued to work on the webbing for spiderman's face. I am currently reconstructing the web. I will then liquify it to take the shape of scooby's face.

Bellow are some pictures of house that I might use for my haunted house project. These are in order from least to most favorite. The last one is my favorite.


Monday, October 1, 2012

Hello,
Today I worked on spiderman's web for his face. I havent finished yet.


Thursday, September 27, 2012

Today I continued to work on my spider-doo project. I changed the color of scooby's and am now working on putting the webbing onto scooby's face.

Tuesday, September 25, 2012

Today in class, I started working on my spider-doo project. So far, I have cut scooby's head out and put in on spiderman's body. I will later change the color of scooby's head.

Thursday, September 20, 2012

FInal Zebra-Rhino Project

Hello,
Above is my final zebra-rhino project. The assignment was to combine a zebra and rhino using photoshop. I used the liquefy tools and the lasso tools to complete this assignment. The face was the hardest part to do.


Tuesday, September 18, 2012

Today, I continued to work on my zebra-rhino project. I liquified the zebra so that it would take the shape of the rhino. Then I painted over the zebra to give the effect of shadows. I still have to work on the face and the shadows.

Friday, September 14, 2012

Today I worked on the zebra rhino final project. I liquified the rhino but it didn't look very good so i had to start over. When I liquified the zebra rhino the stripes looked really blurry and fake. I will try again next time!

Wednesday, September 12, 2012

Today, I finished my statue of liberty project and started the rhino zebra project. I am still cutting out the zebra with the lasso tools and then I will use the liquify tools to finish the assignment.

Statue of Liberty Final Project

Above is my final cut out project. Our assignment was to cut out the statue of liberty. The background was blue sky. I did this by using the lasso tools and the selection tools. I think the polygonal lasso tool was the most useful for this project.


Monday, September 10, 2012

Today in class, I learned how to use the lasso tools and the marquee tools. I used these tools to cut out the statue of liberty. I am not finished yet but I am close.

Final Dog Project

Hello again,
         Above is my final project. Our assignment was to remove various objects from the picture using the healing brush. I think the most difficult part of this project was removing the tree branch.